· Nas · Technology · 11 min read
How to Use Claude + Remotion to Create AI Videos - A Beginner's Guide
Learn how to create product demos, social media content, and animated videos using Claude and Remotion - no coding required. Step-by-step tutorial for beginners.
How to Use Claude + Remotion to Create AI Videos
We’ve reached a point where you can create full videos with a single prompt. No video editing software, no After Effects, no hiring a freelancer. Just you, a text prompt, and AI.
That’s exactly what you can do with Remotion - a skill you can add to Claude that lets you create product demos, social media content, and even dynamic presentation decks. Claude writes all the code behind the scenes. You just describe what you want in plain English.
In this guide, I’m going to walk you through exactly how to set up and use Remotion with Claude - step by step. We’ll cover installing Claude for Desktop, understanding skills, setting up Remotion, and then we’ll actually build two things: a product demo video and a social media animation for Instagram. All without writing a single line of code.
If you’re a beginner, this is the perfect tutorial for you.
What is Remotion?
Remotion is a framework that lets you create videos programmatically - meaning instead of dragging clips around on a timeline, the video is built from code. Developers love it because it gives them full control over animations, transitions, and dynamic content.
But here’s the thing: you don’t need to know how to code to use it. When you add Remotion as a skill to Claude, the AI writes all the code for you. You just describe what you want the video to look like, and Claude builds it.
What can you make with it?
- Product demo videos - Showcase your app, website, or product with animated walkthroughs
- Social media content - Create eye-catching Instagram Reels, TikTok videos, or YouTube Shorts
- Presentation decks - Build animated slides that are far more engaging than PowerPoint
- Explainer videos - Break down complex ideas with simple animations and text
If you’ve already been using Claude Code to build software, think of Remotion as the next level - now you can create video content with the same AI assistant.
Step 1: Install Claude for Desktop
If you don’t already have it, the first thing you need is the Claude Desktop app.
- Go to claude.ai/download
- Click Download for Mac or Download for Windows depending on your machine
- Run the installer and open the app
- Sign in with your Claude account (or create one if you don’t have one yet)
Once you’re in, you’ll see three tabs at the top of the app: Chat, Cowork, and Code.
- Chat is the standard conversation mode
- Cowork is where Claude can execute code and work with files on your computer
- Code is for more advanced coding workflows
For this tutorial, you’ll want to switch to Cowork mode. This is what lets Claude actually create and run the video files on your machine.
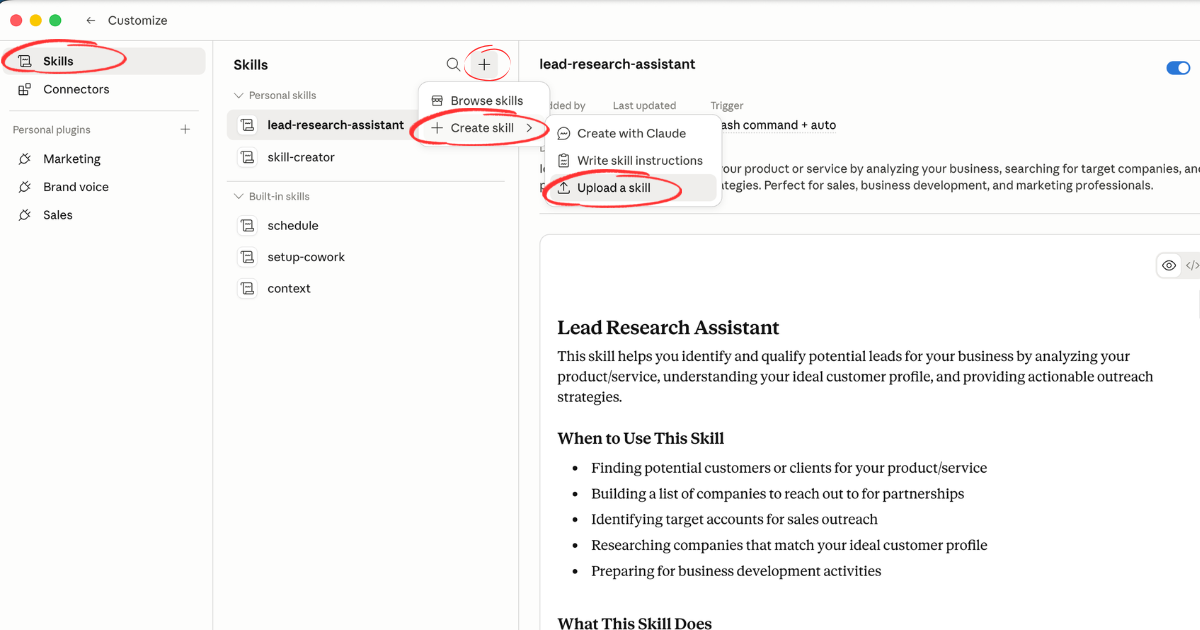
Step 2: Understanding Claude Skills
Before we install Remotion, let me explain what skills are - because they’re one of the most powerful features of Claude Desktop.
Think of skills like cheat codes. If you’ve ever played video games, you know that certain combinations of inputs can give your character special powers. Skills work the same way for Claude - they give it new capabilities that it doesn’t have by default.
Here are three important things to know about Claude skills:
1. Each Skill is Built for a Specific Capability
Skills aren’t generic - they’re purpose-built. Remotion, for example, is specifically designed for creating AI videos. There are other skills for different tasks, but each one is tailored to do one thing really well.
2. Install Once, Use Forever
Once you add a skill to Claude, it’s there permanently. You don’t need to reinstall it or set it up again. Next time you open Claude and want to make a video, the Remotion skill is already ready to go.
3. Skills Can Be Combined
As you get more advanced, you can actually combine multiple skills to create more complex workflows. For now, we’ll stick with Remotion on its own - but know that the possibilities grow as you add more skills to your toolkit.
If you want to learn more about customizing Claude for your projects, check out our guide on how to write the perfect CLAUDE.md file - it’s another way to make Claude work exactly the way you want.
Step 3: Install Remotion
Now let’s actually install the Remotion skill. This is where the fun starts.
First: Enable the Prerequisites
Before installing any skill, you need to make sure Claude has permission to execute code and create files on your machine. Some people skip this step and run into errors later, so don’t skip it.
- Open Claude Desktop
- Go to Settings (gear icon)
- Navigate to Capabilities
- Make sure Code Execution is toggled ON
- Make sure File Creation is toggled ON
These two settings power the sandbox environment that Claude uses to run Remotion. Without them, skills won’t work.
Second: Install the Remotion Skill
Now, paste this exact prompt into your Claude chat:
Can you set up this skill for me: npx skills add remotion-dev/skillsClaude will handle the rest. It will download and configure the Remotion skill automatically. Wait for it to confirm that the installation is complete before moving on.
Third: Set Up Your Project Folder
Before you start creating videos, I recommend opening a dedicated folder for your video projects. In Claude Desktop, go to File > Open Folder and either select an existing folder or create a new one (something like “my-videos” on your Desktop).
This keeps all your video files organized in one place instead of scattered across your computer. Trust me, this saves a lot of headaches later.
Need help setting up Claude for your project?
Get in Touch Today →Step 4: Create a Product Demo Video
Now that Remotion is installed, let’s create something real. We’re going to build a product demo video - the kind of video you’d use to showcase your app, tool, or website.
Writing Your First Video Prompt
The key to getting a great video from Claude is being specific. Don’t just say “make a video about my product.” Instead, describe exactly what you want to see.
Here’s an example. I have a tool called Quizzings that turns study materials into interactive quizzes. Here’s how I might prompt Claude:
“Create a 30-second product demo video for Quizzings - a tool that turns PDFs into interactive quizzes. Show the following sequence: first, a title screen with the Quizzings logo and tagline ‘Turn any PDF into a quiz in seconds.’ Then show someone uploading a PDF, followed by an animation of quiz questions being generated. End with the score results screen and a call to action: ‘Try it free at quizzings.com’. Use a clean, modern design with a purple and white color scheme.”
Notice how specific that is. I’m telling Claude:
- What the product is
- What sequence of screens to show
- What text to display
- What style to use
- How long the video should be
When the First Result Isn’t Perfect
Here’s something important to know: the first version almost never comes out exactly right. That’s completely normal. Think of it like briefing a designer - you’ll usually go through a round or two of revisions.
If the video isn’t quite what you wanted, just tell Claude what to change:
“The transitions are too fast - can you slow them down? Also, make the title text bigger and change the background to a gradient instead of solid white.”
Claude will update the video based on your feedback. Keep iterating until you’re happy with the result.
Using the Remotion Studio
When Claude creates your video, it may also open the Remotion Studio - a visual editing environment where you can preview your video and make manual adjustments if needed.
If the studio doesn’t open automatically (it didn’t for me the first time), just ask Claude:
“Can you open the Remotion Studio?”
Claude will give you instructions to launch it. The studio is particularly useful if you want to:
- Fine-tune specific elements like timing or positioning
- Add a voiceover to your video
- Export in different formats or resolutions
For this beginner tutorial though, you can do everything through chat prompts alone.
Step 5: Create a Social Media Video
Now let’s make something for social media. The process is very similar, but with one important difference: dimensions.
Social media videos (Instagram Reels, TikTok, YouTube Shorts) use a vertical format - 1080 x 1920 pixels. Regular videos are horizontal. If you don’t specify this in your prompt, Claude will default to a horizontal format.
Example Prompt for an Instagram Reel
“Create a 15-second Instagram Reel animation in vertical format (1080x1920). The video should promote a website audit service. Start with bold text: ‘Is your website losing you customers?’ Then show three animated bullet points appearing one by one: ‘1. Slow load times’, ‘2. Confusing navigation’, ‘3. Weak call to action’. End with ‘Get a free audit’ and a swipe-up animation. Use bold typography, a dark background, and accent colors of blue and white.”
Getting the Dimensions Right
Here’s a tip from my own experience: the first render might come out in landscape (horizontal) format even if you asked for vertical. If that happens, don’t worry - just follow up with:
“Can you change this to vertical format for Instagram? The dimensions should be 1080 pixels wide by 1920 pixels tall.”
Claude will rebuild the video in the correct dimensions. When you transfer it to your phone, it will display perfectly.
Whether you’re building a landing page with v0 or creating video content with Remotion, the pattern is the same: describe what you want in plain English, let AI build it, and iterate until it’s right.
Tips for Getting Better Results
After creating a few videos, here’s what I’ve learned works best:
Be specific with every detail - Don’t leave things to chance. Specify colors, fonts, timing, transitions, text content, and dimensions. The more detail you give Claude, the closer the first draft will be to what you want.
Iterate, iterate, iterate - Your first prompt won’t produce a perfect video. Plan for 2-3 rounds of refinement. Each round, tell Claude exactly what to change. This is normal and expected.
Use Remotion Studio for fine-tuning - If you need pixel-perfect control over timing or positioning, open the studio. It gives you a visual timeline to work with.
Start simple, build complexity - Begin with a basic animation - maybe just text appearing on screen with a background color. Once that looks right, add elements: images, transitions, multiple scenes. Don’t try to create a blockbuster on your first attempt.
Save prompts that work - When you create a video you love, save that prompt somewhere. You can reuse and modify it for future videos. This is especially useful for social media content where you want a consistent style.
Creating video content for your brand is one of the most effective ways to drive engagement. If you’re also working on your landing page conversion rates, having great video content to embed or share on social can make a big difference.
Want someone to handle the technical setup for you?
Get in Touch Today →Nas’ Note: Video Creation Just Got Democratized
Here’s what excites me about this: creating professional video content is no longer reserved for people with expensive software and years of editing experience. With Claude and Remotion, anyone can create product demos, social media content, and animated presentations in minutes.
Think about what this means for founders. Instead of spending $500 on a freelance video editor for a 30-second product demo, you can create it yourself in an afternoon. Instead of waiting days for revisions, you iterate in real time. Instead of one video a month, you can publish one a week.
If you’re running Meta ads for your Shopify store or trying to get your first 100 customers, having the ability to quickly create video content gives you a massive advantage. Video consistently outperforms static images on every platform.
The tools are here. They’re free to start with. And they’re only getting better. Download Claude Desktop, install the Remotion skill, and create your first video today. You’ll be surprised how good it looks.
Liked what you just saw? Follow me on Youtube or connect on LinkedIn for more insights on growing your business online.
Video Guides you might like:
 How to use Claude Code to build Apps
  10 Best Claude Code Skills for beginners
  How to create AI Video Animations with Claude + Remotion
  How to use Claude Code to build a Website
  How to use Claude Skills for beginners
 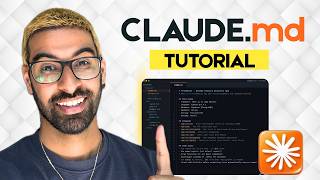 How to write the PERFECT CLAUDE.md file
  Automate 80% of your Marketing with Claude
  How to use Claude Code — The basics
  Work 2X Faster with Claude Cowork
  How to NEVER Hit Claude Usage Limits Again